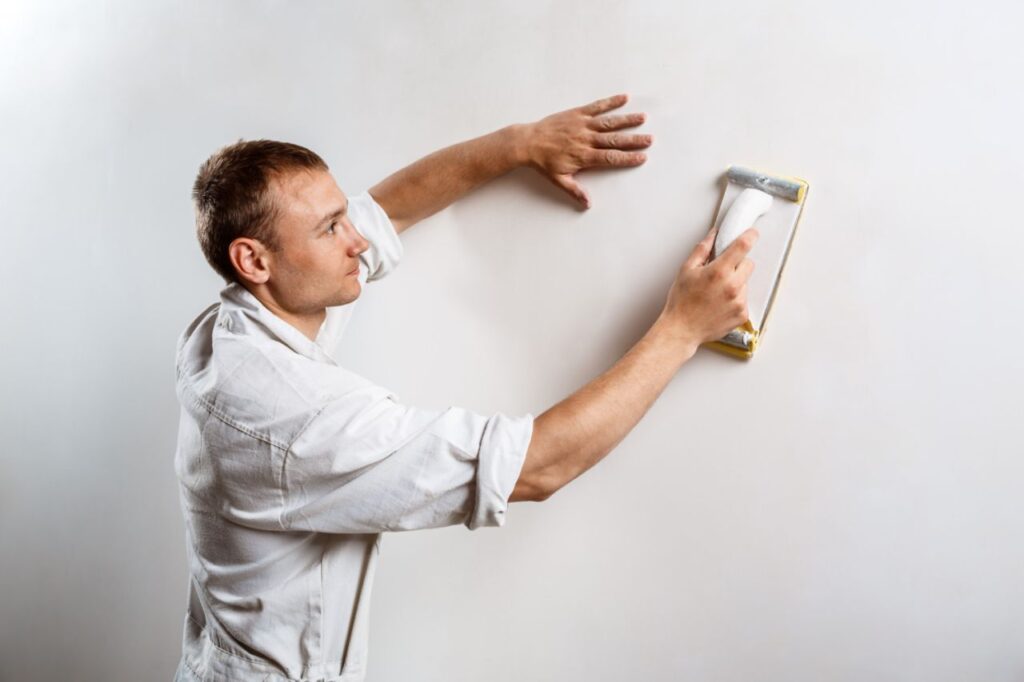
As experts in the field of plastering, we understand the challenges that come with achieving a perfect finish. Plastering is a skilled trade that requires a lot of experience and technique, but it can also be made easier with the right tools.
Plastering is a difficult task. This is a physically demanding profession. And don't even mention plastering ceilings. Plastering ceilings is great exercise, so there's no need to go to the gym.
Plastering, on the other hand, may be simplified with the use of several tools. If you truly want to simplify things, we here at CES strongly advise purchasing or renting a plastering machine. This will make life a lot less difficult.
Even if you are using machines, there are some plastering tools that are indispensable. CES offers a variety of plastering products that can help you save time while ensuring that the finished product is of high quality.
If you make the necessary financial investments, you will be able to avoid experiencing muscular tension and produce flawless plaster.
In this article, we will introduce you to some of the best tools that can help make plastering easier, faster, and more efficient.
Cheap Plastering Tools – Is It Worth It?
The answer, in a word, is NO! One of the worst things you can do is purchase low-quality equipment to use for plastering. If you use a trowel from Dollar General, you will never be able to achieve a flawless, level surface.
Purchasing high-quality plastering tools is a need if you intend to take your plastering hobby seriously. The difference between a professional finish and one that was done by your neighbourhood cowboy, who gave your walls the appearance of having been destroyed by Godzilla, is the quality of the finish.
Ok, maybe not that bad…
Plastering requires a wide variety of tools, so it's essential to have a comprehensive assortment on hand. They will make your life a great deal simpler, particularly the tools that we propose to you. Everything on the list has been utilised, and I continue to utilise it.
If it weren't the case, I wouldn't bring it up. We will highlight the more affordable plastering equipment whenever that is feasible, and we will be sure to highlight the essential plastering tools whenever that is required.
Top Plastering Tools
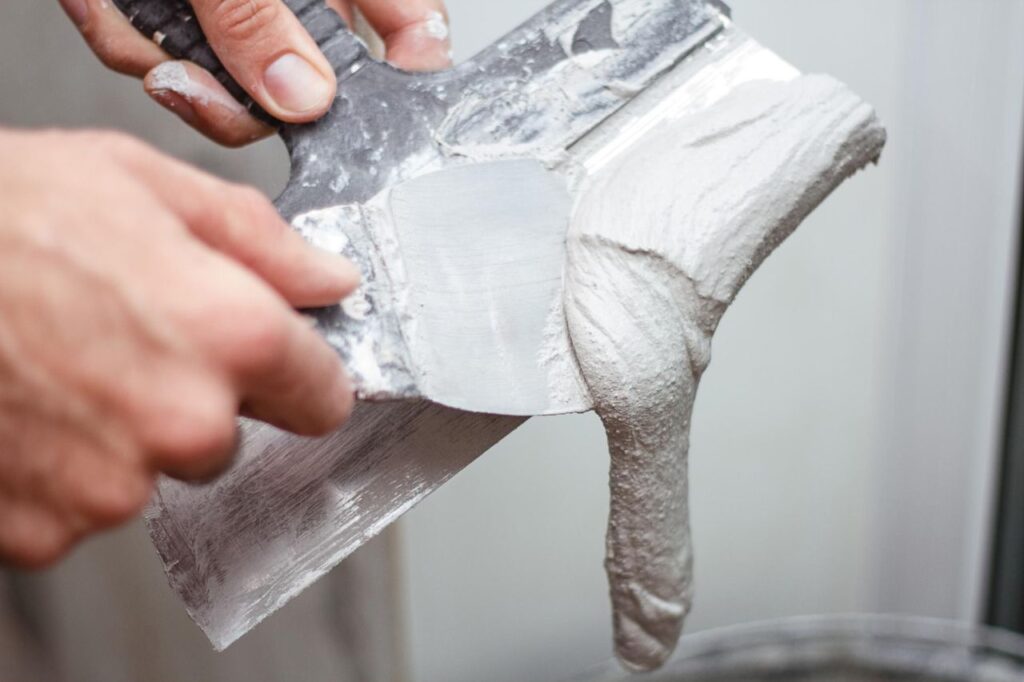
Plastering Trowel
Doesn't it appear to be self-evident? Plasterers are required to have a plastering trowel, which is also often referred to as a finishing trowel. This is a really important piece of equipment.
Plastering without the use of a trowel is like Batman fighting crime without Robin; the trowel is one of the most effective instruments for plastering that money can purchase. After plaster has been applied to a wall or ceiling with this instrument, the wide, flat, rectangular blade may be used to smooth the plaster.
You can get a more uniform finish by using this specialized plastering tool, which helps you swiftly flatten and level plaster. When it comes to the finishing trowel, we strongly advise making a quality investment because low-cost trowels will not last as long.
This Marshalltown Gold Permashape Plastering trowel is our number one best-selling product. This trowel is built to last, and more significantly, it features a handle that is easy to hold.
Plastering trowels of the highest grade benefit from having flexible blades like those seen in OX variants. In conclusion, in order to get the ideal smooth finish, you should constantly check that the surface of your trowel is clean.
What size trowel?
I would advise you to purchase a stainless steel plastering trowel measuring 14 inches (inches).
Because smaller tools are easier to manage, many of the older guys will recommend that you begin with a trowel that is 12 inches in length. Nevertheless, I have the impression that it is somewhat unproductive.
When using the smaller trowels, there is less room to store the plaster, which makes it more difficult to apply it to the walls. In addition to this, in the long run, you will need a plastering trowel that is at least 14 inches long. The majority of the plasterers I've encountered use a trowel measuring 14 feet, particularly the better plasters I'm familiar with.
So let me summarise what I mean. Why should I become accustomed to using a 12" trowel if I will soon have to switch to a different one and become accustomed to that as well? You might as well use equipment for plastering that you intend to use for the rest of your life.
You may find that initially controlling the trowel is difficult, but with practise and experience, you will eventually be able to do so. I suggest getting a trowel from Marshalltown that is 14 inches by 5 inches and made of stainless steel.
Trowels manufactured by Marshalltown are widely considered to be among the very best available. To tell you the truth, I wholeheartedly concur. This firm has never given me any cause for concern, and the pre-broken-in trowels they sell provide for an excellent place of departure.
They are long-lasting, easy to work with, and consistently produce a quality finish. The width of 5" makes it possible to practise the transition from one stage of applying plaster to the next across a larger surface area.
The Marshalltown MPB145GSD Stainless Steel Plastering Trowel comes highly recommended by me. It's a trowel that can be used for a variety of different plastering techniques by a variety of different persons at various stages of their plastering careers. It's the trowel I reach for most often, thus it's also the one I recommend most strongly to others to purchase.
Marshalltown is most certainly an excellent place to begin. Don't waste your money on low-quality, low-cost trowels. As was previously said, they do not have a long lifespan, they are quite difficult to operate, and after usage they frequently rust and corrode. Invest in a tool that is of sufficient quality and has received positive feedback.
Learning to plaster becomes a lot less difficult as a result. They come at a higher cost than most other options, but with proper care, they may last a lifetime. Believe me when I say that this purchase was well worth the money that was put into it.
Corner trowel
When it comes to plastering, getting the corners just right may be one of the most difficult challenges since they are the elements that determine whether the entire wall looks good or awful.
The use of a corner trowel makes the task noticeably simpler and more efficient. Check out this one from Ragni that has rounded corners and is manufactured from high-quality stainless steel. It also features a hold-fast, non-slip handle with a finger guard for added safety.
Plastering Hawk
Plastering also requires a hawk, which is a vital instrument. It is a portable instrument that can retain plaster, and because of this, it enables you to apply plaster in a rapid and easy manner.
The flat plate will be able to contain a tiny bit of plaster, which will allow the process to go more quickly because you won't need to continually going back to the primary supply of plaster. It comes be especially helpful for plastering high walls and ceilings, both of which are notoriously difficult to access.
A hawk does not require a significant financial investment. On the other hand, you could find that the models made of foam or plastic are not as long-lasting as the versions made of aluminium.
The most important thing is to make sure that your hawk is not too heavy and that it has a good grip.
Bucket Trowel
You are going to require a bucket trowel in addition to your hawk. Plastering walls requires this instrument to be used extensively. The plaster can be transferred from the bucket to the hawk with the help of your reliable bucket trowel.
Plaster is a heavy substance, so you will need to choose one that can withstand the weight. On the other hand, this plastering tool is one in which you do not need to spend all of those cents. Consider shelling out between five and ten pounds for this plastering equipment.
Corner Trowel
Plasterers' work is frequently evaluated according to how evenly the finish is applied and how neatly the corners are worked. Plastering a wall correctly can make or break a corner, which is why it is one of the most difficult aspects to master.
A corner trowel is an extremely useful piece of equipment that enables you to accurately complete the most complicated aspects of a project. They have a profile that allows them to easily and swiftly fit into those intricate corners, so producing a clean finish.
Mixing Bucket
When plastering, it is necessary to have this uncomplicated but essential material on available. We recommend purchasing a mixing bucket with a capacity of at least 15 litres because it will serve a variety of purposes.
Because your plaster needs to be mixed in a bucket, you'll want to make sure it's one that's solid and durable enough to handle the thick substance. A pail of water is also helpful to have on hand in order to keep instruments clean. Before you begin mixing, you must always make sure that your bucket is spotless and devoid of any moisture. Your goal should be to create a perfectly smooth plaster.
Powermixer
In days gone by, plaster would have been mixed by hand using a spade as the mixing tool. On the other hand, electronic tools are now available that can do the laborious work for you.
Purchasing a high-quality electric mixer such as our Eibenstock Paddle Mixer is an investment that will prove to be worthwhile. These very effective mixers are available in a wide range of configurations.
They combine a wide variety of components, such as prefab, mortar, prefab plaster, render, cement, concrete quartz including epoxy resin, flooring and sealing compounds, gypsum, and granulates, amongst other things. You will not only save time but also get the ideal consistency for your mixture if you use a paddle mixer.
Spatula
When it comes to finishing touches on walls, ceiling coatings, plaster, and spray finishes, spatulas are the instrument of choice. The Spatula Plus from CES is the instrument that you should use to properly level and smooth off layers of plaster or render.
When searching for the ideal spatula, you should go for one that has a handle that has a soft grip to maximise your level of comfort when scraping food.
Additionally, you should seek for a design that is lightweight because this will allow you to continue working for a longer period of time. Blades made of stainless steel are an excellent choice for ensuring a rust-free and flexible instrument that is up to the task at hand and will endure for an extended period of time.
Hammer
A reliable hammer is an essential tool for everyone who wants to try their hand at plastering. The claw hammer and the drywall hammer are considered to be the two types of hammers that are the most useful.
Either kind can be useful for chipping away chunks of plaster and for resecuring or removing bits of lath that are causing problems. Drywall hammers have ends that are shaped like hatchets and faces that are curved so that they can dimpling high areas. Because of this, they are highly handy for plastering.
Hawk
Plastering with a hawk is akin to working with a tray or a pallet, which are also tools that an artist may employ. The hawk is often a square-shaped tray that features a handle that extends underneath the tray itself.
When transporting wet plaster, the hawk is the tool of choice. The professional in plaster can reach down with a trowel, take some wet plaster, and then put it to the wall.
Hawks come in a variety of sizes, but the most essential thing is to make sure the handle is ergonomic and comfortable for your hand. Hawks are also available in a variety of colours. If the hawk does not work well for you, carrying damp plaster might cause your load to become rather heavy.
I have 2 options.
The plastic Hawks are perfect for beginners. They’re cheap, easy to use but more importantly, they are extremely light. This is going to be a big help when you’re new to plastering.
That’s because when you won’t be trained in holding a hand full of plaster all day. It gets heavy as the day progresses!
That’s why the plastic hawks are brilliant for beginners. It will save you a lot of strain and hard work. However, they aren’t that strong and they can often snap with time. There is another option if you want one that will last:
Aluminium Hawks - These Hand Boards are a lot stronger. They will last longer but are still quite light due to the lightweight aluminium. They are a bit more expensive but will definitely last longer than the plastic types.
You don’t need to spend a lot of money on a Hawk – they literally hold your gear. I personally use the Marshalltown hawks because there Durasoft handles are comfortable during use. However, a cheaper model will suffice!
Utility Knife
Plastering is just one of many occupations that require a broad array of vital gear, and one of those things is a utility knife. The utility knife may be used to help score walls or even open materials that need to be employed in the process of plastering.
The utility knife has a blade that can be replaced and is often of a higher grade than other knives. A fantastic utility knife is an item that will remain in the tool belt of a plaster professional for the duration of the workday.
Because this is a product that will be used on a daily basis, you should look for something that is not only portable but also very durable.
The value of having a utility knife that is of a good grade cannot be understated. When you are plastering, you will use it to score the existing wall, cut patches from sheets of drywall, and open bags of plaster mix.
It is essential to carry a high-quality utility knife at all times; nevertheless, you must never forget to keep the blade sharp. A dull or chipped blade is more dangerous than one that is sharp since it is more difficult to wield.
5 Gallon Bucket
Plaster is often mixed with the assistance of a bucket. As a plaster socialist, you will probably end up requiring quite a few buckets, but it is necessary to have a bucket with a capacity of 5 gallons that is of high quality and will function for a variety of different jobs.
Take note of the handle that is located on the bucket that holds 5 gallons. The purpose of a well-made bucket is to ensure that it is manageable in spite of its weight when it is filled with wet plaster by facilitating its portability.
When you need something that can hold 5 gallons of liquid, having a bucket that comes with a lid is a good investment to make.
Safety Glasses
Many professionals in plaster are accustomed to working without the use of an excessive amount of personal safety equipment. However, this is not a very good course of action to take.
When working with plaster, it is likely that you will be moving swiftly; as a result, shards of plaster may become airborne and strike you in the face or eyes. When reaching for things and working overhead, this is of utmost significance.
You may choose from a wide variety of safety glasses or goggles available on the market today to assist you in being comfortable while also ensuring the protection of your eyes. Because protective eyewear should be worn for the most of the time, you should look for a pair that is also comfortable to wear.
Paint Brush
In the last phases of plaster preparation, a paintbrush of exceptional quality is employed. You may get the appearance of a much smoother full finish by using a wet paintbrush to wipe up the wall at the end of the painting process.
The thicker paintbrushes often perform a little bit better since they can contain more water and help the painting process go a little bit faster. The paint brush with a size of around 4 inches is often considered to be one of the better options available on the market.
Water Brush
Plasterers water brush
Especially if this is your first time, you are going to want to invest in a water brush. This is often used as the final layer of plaster, as it is utilised near the conclusion of the process. A small amount of water prevents the plaster from coming apart and gives a finish that is faultless.
In addition to this, if you are running behind schedule and the plaster is already hardening, you may frequently preserve it by mixing water with it. I hate to be the one to break the news to you, but this is unavoidable. There may be moments when the pace is too rapid for you to keep up with, and you will fall behind.
At this point, the water brush will come to your rescue, saving both you and your plastered walls. Trust me, it's necessary
Water Brushes
You may clean your borders with the brush, and you can splash water over your covered walls using the brush. So, which ones should we choose?
Plastering-specific water brushes measuring 6 inches in length are readily available for purchase. Even when they are at their most costly, though, I believe that purchasing one is always money well spent. Low-quality brushes frequently embed their bristles in the plaster, necessitating a great deal of extra work.
This 4 inch masonry brush by Travis Perkins is one of my favourites. Plastering is a suitable use for this brush because of its durability and longevity; it is a solid choice overall.
I use the same brushes as the professional decorators. When compared to all of the others that I've used, the brushes that come from a firm called Fat Hog are the most durable and long-lasting ones. I acquire mine from that company. They are completely out of their freaking minds!
Again, they are a little on the expensive side, but if you hunt online, you might be able to find a deal or two.
Rafina Megamixer’s
These mixers are among the best available on the market, and I believe they are the best I've ever used. Produced in Germany, they are renowned for their dependability, longevity, and high quality across the world. They are made for mixing any kind of plaster that you can think of.
I would suggest that you try to go for H-frame models. The mixing of the plaster is made very simple and requires very little effort thanks to the frame. They are far more comfortable to wear than the D frames, which, if I'm being honest, I find to be very ungainly.
MEGAMIXERS from Refina are a well-proven and sturdy power tool that will perform a complete mixing action in order to produce consistent results.
The MM30 Mega Mixer comes with an MR3 160G spiral paddle that is 6 inches (160mm) long and features a new ergo design H handle for added comfort.
However, there is a caveat to this offer. These terrible bastards will set you back a fair penny. With prices beginning at 360 pounds, they are unquestionably more expensive than comparable versions.
They make perfect sense to the plasterer who works on a daily basis, but there are additional solutions available for those just starting out:
Conclusion
Plastering is a physically demanding profession, but can be simplified with the right tools. CES offers a variety of plastering products that can help save time and ensure high quality. Purchasing high-quality tools is essential for a professional finish.
Plasterers must have a plastering trowel, which is one of the most effective tools for plastering. It should be made of stainless steel and at least 14 inches long, as smaller trowels are unproductive.
Invest in a quality, long-lasting, stainless steel plastering trowel from Marshalltown for a long-lasting, easy-to-work with tool that can be used for a variety of plastering techniques. Corner trowels are essential for getting the corners just right. Plastering requires a corner trowel, a plastering hawk, a bucket trowel, and a bucket trowel.
The hawk is portable and can retain plaster, while the bucket trowel can transfer plaster from the hawk to the hawk. A corner trowel, mixing bucket, powermixer, and spatula are essential tools for plastering.
The bucket should be spotless and devoid of moisture to create a smooth plaster. The spatula should have a soft grip to maximise comfort. The most important details are that a reliable hammer, hawk, and trowel are essential tools for plastering.
Hammers are useful for chipping away chunks of plaster and for resecuring or removing bits of lath. Hawks come in a variety of sizes and colours.
Aluminium Hawks, Utility Knives, and 5 Gallon Buckets are essential for plastering professionals. Utility knives should be sharp and portable, while 5 Gallon Buckets should be of high quality to ensure portability.
Invest in a bucket that can hold 5 gallons of liquid, safety glasses, a paint brush with a size of 4 inches, and a water brush for the final layer of plaster. These tools are essential for ensuring the safety of both the plasterer and the walls. Water Brushes, Fat Hog, Rafina Megamixers, and Refina MM30 Mega Mixers are all good options for plastering.
They are durable and long-lasting, but expensive. Refina MM30 Mega Mixers are more expensive than comparable versions.
Content Summary
- In this article, we will introduce you to some of the best tools that can help make plastering easier, faster, and more efficient.
- Purchasing high-quality plastering tools is a need if you intend to take your plastering hobby seriously.
- We will highlight the more affordable plastering equipment whenever that is feasible, and we will be sure to highlight the essential plastering tools whenever that is required.
- Plasterers are required to have a plastering trowel, which is also often referred to as a finishing trowel.
- In addition to this, in the long run, you will need a plastering trowel that is at least 14 inches long.
- I suggest getting a trowel from Marshalltown that is 14 inches by 5 inches and made of stainless steel.
- Don't waste your money on low-quality, low-cost trowels.
- The use of a corner trowel makes the task noticeably simpler and more efficient.
- Hawk Plastering also requires a hawk, which is a vital instrument.
- You are going to require a bucket trowel in addition to your hawk.
- The plaster can be transferred from the bucket to the hawk with the help of your reliable bucket trowel.
- We recommend purchasing a mixing bucket with a capacity of at least 15 litres because it will serve a variety of purposes.
- You will not only save time but also get the ideal consistency for your mixture if you use a paddle mixer.
- The claw hammer and the drywall hammer are considered to be the two types of hammers that are the most useful.
- Plastering with a hawk is akin to working with a tray or a pallet, which are also tools that an artist may employ.
- The value of having a utility knife that is of a good grade cannot be understated.
- It is essential to carry a high-quality utility knife at all times; nevertheless, you must never forget to keep the blade sharp.
- 5 Gallon Bucket Plaster is often mixed with the assistance of a bucket.
- When you need something that can hold 5 gallons of liquid, having a bucket that comes with a lid is a good investment to make.
FAQs About Plastering
This is one of the best ways of getting a smooth plastered wall. Skim coating involves applying a thin coat of plaster over the existing plastered surface. The process begins with the application of a PVA bonding to stabilize the surface and prepare it for the skim coat.
One of the more popular methods of smoothing out uneven, rough plaster walls is by applying what's referred to as a skim coat. Essentially, an additional coat of plaster will be applied atop the original plaster walls which, since it's still wet and malleable, can be moulded into place evenly and uniformly.
Plastering right down creats a problem purely from a going off issue. The floor will suck the plaster dry too quick and as you trowel up, you end up dragging bits of harder plaster up the wall, thus marking the wall.
The reason that the plaster bubbles is because the moisture present within the wall has risen to the masonry's surface, and has come into contact with the plaster covering the brickwork. As the moisture comes into contact with the plaster, the plaster bubbles up and rises off of the wall that it has been adhered to.
It will take about 3-4 hours to finish the average wall or ceiling. It's best not to use power tools on new plaster because they create dust that can damage the plaster. If you're planning to paint over the finished plaster, give it at least five days to set before painting.