Welcome to our comprehensive guide on Venetian plaster, an exquisite technique that has been used for centuries to create stunning walls and ceilings.
In this ultimate guide, we will delve into the world of Venetian plaster, its history, application techniques, benefits, and maintenance.
It is thought that the first use of Venetian plaster, which has a beautiful and durable texture that imitates natural stone, dates back to the fourth century in Rome.
The ability to create it is one that requires years of practice to perfect; nevertheless, there is opportunity for artistic licence. Do-it-yourselfers are able to execute the procedure because to advancements in equipment and materials.
Plaster from Venice is an excellent material for use as a kitchen backsplash. It could look like a daunting task to clean. However, after the texture has been polished and coated, it is just as easy to clean as grouted tile if it has been properly prepared.
This Venetian plaster wall is the one project that the Family Handyman team worked on to renovate our kitchen that was the easiest for novice do-it-yourselfers to do and made a significant contribution to the room's overall appearance.
Whether you're a homeowner, interior designer, or simply an enthusiast, this guide will equip you with the knowledge to transform any space into a masterpiece of timeless elegance.
How Is Venetian Plaster Made?
By gaining a grasp of the production process for Venetian plaster, one may have a greater understanding of the plaster's composition, quality, and aesthetic look.
Plaster Artistry suggests that Venetian architects started using this plaster because traditional building materials were too heavy to ship over the water. This was the case in Venetian architecture.
It made more sense to utilise lightweight materials rather than heavy stone because Italy is a peninsula surrounded by water, and Venice is a city that is primarily connected by canals.
Historical artisans traditionally made the putty used in Venetian plaster by heating up limestone and then combining it with water.
The goal was to develop a product that was more lightweight but yet gave the impression of being made of expensive marble. Over the course of hundreds of years of evolution, humans started adding new components in order to subtly change the overall composition as well as the colour and shine depending on the circumstances.
In addition, several producers have made the switch from employing conventional limestone as a basis to using either acrylic or gypsum as an alternative (though WCC).
Marble dust is a popular extra component that is used to give Venetian plaster its signature sheen. This is because the appearance and texture of Venetian plaster is meant to mimic that of actual marble.
Recommended Locations for Venetian Plaster in Your Home
You may use Venetian plaster for a variety of home decoration projects, despite the fact that its most well-known application is on the outside of traditional Italian buildings. This plaster may be applied to a wide variety of surfaces, including drywall, gypsum boards, wood, brick, and tile, as stated by Surfaceform.
Because of this, it is suitable for use in projects located inside as well as outside, including walls, ceilings, and backsplashes.
According to Stucco Italiano, Venetian plaster may also be used to refinish furniture, which will increase the furniture's resistance to wear and tear and give it the impression of being made of stone.
Due to the high water content of this plaster, you will not be able to use any of its types to apply a finish to metal or wooden furniture. It does not adhere well to metal surfaces, and the moisture in the air actively warps the wood.
You should also be aware that this kind of plaster can be used in interior locations that have high levels of humidity. It is possible to use it to brighten up the walls of your bathroom or laundry room if you have the appropriate top coat or wax sealer.
How to Use Venetian Plaster to Accentuate Interior Design
You should investigate how to employ Venetian plaster to enrich both the interior and outside architectural layouts of a building now that you know the components that make up Venetian plaster and the locations where it may be utilised effectively.
According to Natural Wall Finishes, the purpose of this material is to provide the impression of expensive marble without the need for extensive maintenance or the hefty price tag normally associated with marble. Interior designers are able to tone Venetian plaster mixes to suit a wide variety of styles by adding coloured pigments.
These pigments may be used to tone the plaster to complement designs ranging from current and modern to boho and rustic. Due to the fact that white and natural colours appear quite beautiful with a marbled design, these colour options are highly popular selections.
Creating feature walls or accent walls with Venetian plaster is one of the most noteworthy use of this material. According to Arizona Painting Company, these walls are a type of interior design approach in which a single wall is painted a distinct colour in order to attract attention and give complexity to a room.
You should keep in mind, on the other hand, that the placement of accent walls calls for considerable attention.
You need to take into account a lot of different things, such as the dimensions and layout of the space, the amount of natural light that enters it, and how the furniture is currently arranged.
These considerations can also play a role in determining the degree of saturation and marbling that should be applied to the accent wall.
The Benefits of Venetian Plaster
The visual appeal of Venetian plaster is the key factor that contributes to its popularity among interior designers and architects.
According to Artistic Renditions, this material possesses a level of depth and intricacy that cannot be found in other plasters and paint jobs.
Altering the general composition of the plaster and using a variety of paints and finishes, as well as other techniques, can also allow you to modify the colour and pattern of the plaster.
You should be aware of the other exceptional benefits and the visual advantages of using this form of stucco.
Due to the fact that it has a permeable structure, it is inherently resistant to mould and mildew, even if it has not been treated or finished in any specific way.
When exposed to high humidity and moisture levels, the mixture of limestone and acrylic resin dries out very rapidly, preventing water from settling in.
Plaster from Venice that is made with lime and other natural ingredients is considered to be environmentally beneficial. Plaster like this is typically placed in several layers, which results in the material having an insulating characteristic.
If your home is well insulated, it will be much simpler for you to keep the temperature inside your home at a comfortable level since warm air and cold air will not be able to escape or enter the home as easily.
What You Need to Know to Start a DIY Venetian Plaster Project
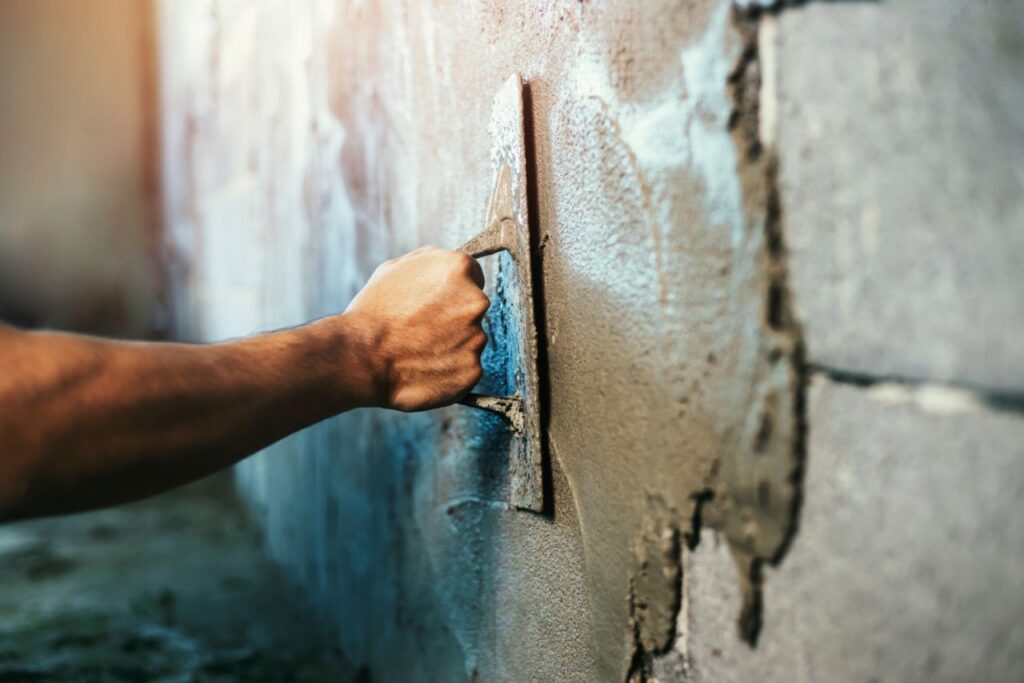
DIY fanatics will be overjoyed to learn that the Venetian plaster finish may be installed on one's own without the assistance of a professional.
It is doubtful that the final results will be as impeccable and faultless as the work done by a professional contractor, but it is feasible to accomplish a respectable job if the appropriate tools and amount of patience are utilised.
Meoded, a firm that specialises in paint and plaster, provides a list of the equipment and supplies required to do the plasterwork on your own.
One of the most essential pieces of advice they have given is to wear protective gear, also called personal protective equipment (PPE).
These goods are essential to ensuring that you do not put yourself in harm's way throughout the process. If you don't already have a pair of work gloves or safety goggles at home, you should consider making an investment in a pair of each.
People who are particularly sensitive to paint or who have respiratory disorders may also want to think about purchasing a respirator or gas mask so that they may avoid inhaling in any fumes or microscopic particles that may be present.
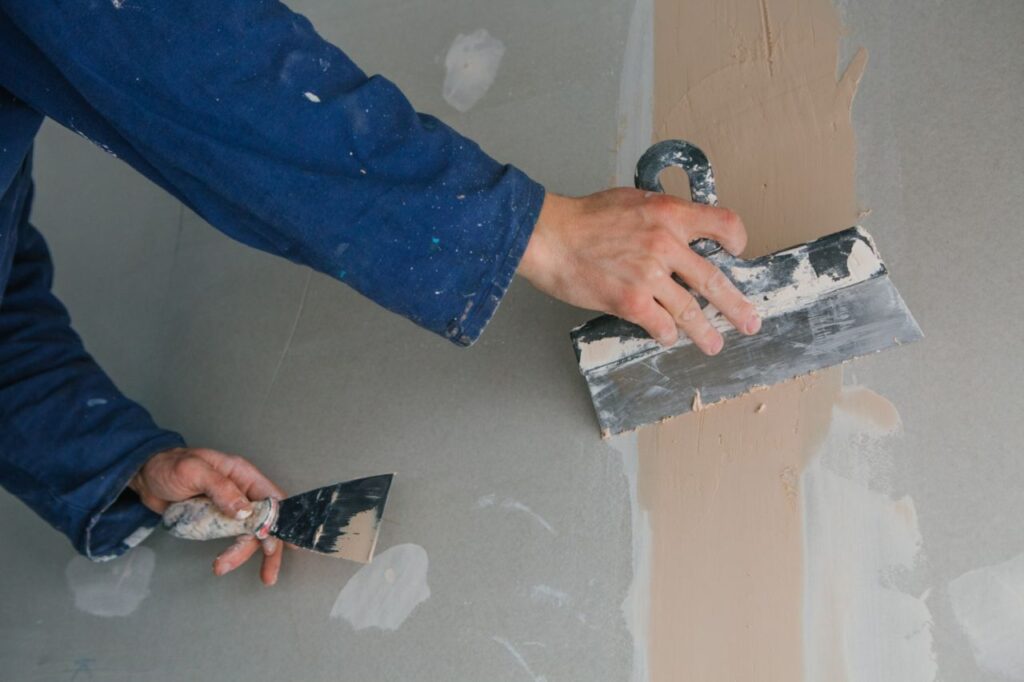
In order to apply the plaster, you will also need a trowel or spatula made of stainless steel, many paintbrushes or rollers for brushing paint and finishes, and a set of paint trays to contain the various necessary ingredients.
Plasterwork requires a primer, the plaster or stucco mixture, natural or synthetic colourants, and a wax finish. If you want to execute a complete job, you will need all of these materials.
Bear in mind that in order to successfully complete this project, numerous layers of plaster, paint, and sealants will need to be applied, and you will need to wait for each layer to cure before moving on to the next step.
As a result, this is a job that will take more than one day and cannot be finished in a single sitting.
Things to Consider When Choosing a Venetian Plaster
Before you go headfirst into the world of plaster, there are a few things you need to think about and plan out before you begin work on your project.
It is crucial to think about where you will be using it, what type or how you want it to appear, what colour you want, whether or not you are prepared for a learning curve, and how much it will cost you.
Before you start, you will want to answer some of these questions yourself. This is because the answers will help you determine what kind of plaster you need and whether or not you should look into alternative possibilities.
Where are you using it?
Determining where you are applying a plaster helps you decide what will work best for your specific situation. Different plasters offer different benefits and properties, so determining your use case helps you figure out what product will be best for you.
What type of look do you want? Shiny vs. Matte
Plasters from Venice are available in a variety of sheens, from matte to lustrous. There will be several variations available within the spectrum of matte to shine, each having a very subtle impact that you may choose from depending on your particular preference.
What color do you want?
Plaster that has already been pre-tinted by the manufacturer of the plaster you are using, such as Frienzecolor, is the quickest and easiest method for colouring plaster.
They are able to match any standard colour chip, including those produced by Benjamin Moore, Sherwin-Williams, and other companies.
Choosing a colour ahead of time not only helps you figure out what colour you want for your area, but it also relieves the stress of trying to figure out how to colour it yourself or match your own colours. Choosing a colour helps you choose what colour you want for your space.
Do you want an easy or complex project?
Figuring out the level of work you are willing to put in before making a purchase is a good way to narrow down your options. Lime paint or lime wash are two possibilities that can work better for you if you are unclear of how much effort you are willing to put into a project, for instance.
How much does it cost?
There is a significant price disparity between the many types of plaster products available. The fact that it is either pre-mixed or comes in a dry mix is another factor that determines the price. In the end, what you choose will be determined by what you enjoy doing and how much work you are willing to put into creating your product.
Preparing Your Walls
Plaster is often put on walls with a level 4 or 5 smoothness, which means there is very little to no roughness. Before you apply your plaster, it is advised that you skim-coat or sand the walls to achieve a smooth surface.
This is especially important if your walls already have texture. Because the texture of the layers underneath will show through, Venetian plaster demands a surface that is completely smooth.
When working with finer plaster, such as glossy plasters like Grasello Fino, it is very vital to achieve a flawless finish since the thin layers of the plaster cannot conceal any faults.
Priming Your Walls
It is advised that you apply a primer to the surface of your wall after it has been smoothed out in order to get it ready for the application of plaster.
Quartz is an excellent component for the finest primer to use when working with coarse Venetian plaster because it provides the plaster with a surface to adhere to and enables even stronger adherence.
When working with finer plasters, it is advised that you use a smooth primer, such as Novalux E Primer, because you want to minimise any surface roughness.
Applying Your Base Coat(s)
The initial layer that you apply is referred to as your base coat. Doing so will construct the foundation upon which you will apply the second and maybe the third coatings.
You want to make sure that you leave enough material on the surface for the first coat, but you don't want to cause any chatter or uneven areas.
What Is Chatter? Why to Avoid It?
When your trowel skips along the aggregate in the plaster, you will experience chatter. This will result in a wavy look as well as little lines, neither of which are often what is intended. When you initially start studying anything, it's normal to have a lot of chatter. To prevent this from happening, ensure that there is sufficient plaster on the wall and that it is smooth before proceeding.
Apply in the Correct Direction
If you are right-handed, you should normally go from left to right, beginning at the dry region and making your way back to the wet spot. Always begin at the dry region and return to the plaster you have previously applied if you are left-handed.
You should work from the right to left if you are right-handed. Because of this, you will be able to go over the plaster with the very minimum amount of pressure necessary to create a smooth surface.
Avoid Overworking Your Plaster
It is important to avoid overworking your plaster on the first coat since doing so will cause the first coat to get burnished, which is exactly the opposite of what you want to happen. It is important that the base coats be smooth, but you should try to avoid going over them too much. Instead, when it has had time to dry, you may, if required, knock off any high spots.
How the Base Coat(s) Should Look
When your first coat is dry, it’ll look even in color and you won’t notice many variations in the movement. In most cases, the dry weight of plaster is lower than its wet weight.
Before going on to the second coat, it is important to ensure that the first coat has had sufficient time to dry completely. You need to apply two base layers when building up the finish with some plasters.
Plasters such as Grassello Fino, which require two foundation layers, are often thinner and glossier than other types of plaster.
Classes that require two coats will have their second coatings applied in the same manner as the first coat, with special attention paid to avoiding early overcompression and premature burnishing.
Applying Your Final Coat
After the first coat of plaster has had enough time to cure, you may begin applying the second and final coat. You will start by applying this coat in the same manner as your base coat, but this time you will compress the Venetian plaster as you apply it.
This is what is meant when people talk about applying "tight." The purpose of the last coat you apply is to achieve a smooth finish by evening out all of the minute variances in the plaster you have used.
In spite of the fact that certain plasters may have a smoother finish than others, the final coat you apply should have a smooth finish all over the surface.
Again, you will want to work from dry to wet, putting the plaster back into the plaster that you have already applied as you move from step to step. In addition to this, you will need to pause every few feet in order to burnish the plaster.
Burnishing your plaster gives it its final touch, and since you want to burnish it while it is still somewhat wet, you need to make sure that you stop before your plaster entirely dries on your last coat.
How to Burnish
The technique of applying pressure with a steel trowel to the surface of your plaster in order to burnish it is known as "burnishing." Because of the friction created between the plaster and your trowel, the plaster will become more shiny as a result.
This may produce a dull sheen or a very bright appearance, depending on the type of plaster you use. Everything hinges on the kind of plaster you use and the degree to which you burnish the surface.
To get an equal and smooth finish, it is important to burnish in a number of different directions and to compress the plaster back into itself. Simply moving your hand down the wall is an excellent approach to get a feel for the smoothness of the plaster finish and ensure that it is smooth.
If you feel any rough patches, you may then go and burnish more areas to ensure that you have a consistent finish.
How to Seal and Protect
Even while your plaster could have a wonderful natural gloss, it is strongly advised that you seal it and preserve it from the elements. Plaster is a naturally porous surface that will absorb any liquids or fluids that come into touch with it.
This may be due to the oils on your hand, a drink accidentally spilt, or water splashing out of a sink.
Using a sealer to protect Venetian and polished plaster is an excellent method to ensure that your plaster will retain its clean appearance and will continue to look good for a very long time.
Soapstone is a form of natural plaster sealer that may be used to offer a foundation level of protection to your plaster. This is a terrific technique to protect your plaster. In its most basic form, soapstone or soap is nothing more than soap. This causes a reaction with the plaster, which results in the production of a natural sealant.
This sealant helps guard against any absorption while preserving the appearance of the plaster. A substance known as cera wax is an option to consider if you want your Venetian plasters, such as Grassello Fino, to have a lustrous appearance.
Cera wax has a higher sheen than other types of Venetian plaster so that it will match the shining plaster more well. However, cera wax may be used for any Venetian plaster product.
Conclusion
Venetian plaster is a centuries-old technique used to create stunning walls and ceilings. It requires years of practice to perfect, but DIYers are able to execute the procedure due to advancements in equipment and materials.
Venetian plaster can be used for a variety of home decoration projects, including drywall, gypsum boards, wood, brick, and tile. It can also be used to accent interior design, providing the impression of expensive marble without the need for maintenance or price tag.
Venetian plaster is popular for creating feature walls and accent walls, as it has a level of depth and intricacy that cannot be found in other plasters and paint jobs.
It is also resistant to mould and mildew and has an insulating characteristic. DIY Venetian plaster can be installed on one's own without the assistance of a professional, but it requires protective gear, trowel, paintbrushes, paint trays, primer, plaster/stucco mixture, colourants, and wax finish.

Choosing a Venetian plaster is a long process, so it is important to think about where, what type of look, colour, and cost. Answering these questions will help you decide what kind of plaster is best for your situation. Determine the level of work you are willing to put in and the price of the plaster product.
Prepare the walls with a smooth surface, apply a primer, and apply a base coat. Avoid chatter and uneven areas by applying plaster in the correct direction, avoiding overworking, and allowing the first coat to dry completely before applying the second.
Two base coats are needed for thinner and glossier plasters. Applying a second and final coat of plaster is important to achieve a smooth finish. Work from dry to wet and pause every few feet to burnish the plaster.
Burnishing involves applying pressure with a steel trowel and compressing the plaster back into itself. Sealing and protecting Venetian and polished plaster is essential to ensure it retains its clean appearance and looks good for a long time. Soapstone is a natural plaster sealer, while cera wax is an option for a lustrous appearance.
Content Summary
- Welcome to our comprehensive guide on Venetian plaster, an exquisite technique that has been used for centuries to create stunning walls and ceilings.
- It is thought that the first use of Venetian plaster, which has a beautiful and durable texture that imitates natural stone, dates back to the fourth century in Rome.
- By gaining a grasp of the production process for Venetian plaster, one may have a greater understanding of the plaster's composition, quality, and aesthetic look.
- You should investigate how to employ Venetian plaster to enrich both the interior and outside architectural layouts of a building now that you know the components that make up Venetian plaster and the locations where it may be utilised effectively.
- Creating feature walls or accent walls with Venetian plaster is one of the most noteworthy use of this material.
- DIY fanatics will be overjoyed to learn that the Venetian plaster finish may be installed on one's own without the assistance of a professional.
- Meoded, a firm that specialises in paint and plaster, provides a list of the equipment and supplies required to do the plasterwork on your own.
- Before you go headfirst into the world of plaster, there are a few things you need to think about and plan out before you begin work on your project.
- Choosing a colour helps you choose what colour you want for your space.
- Figuring out the level of work you are willing to put in before making a purchase is a good way to narrow down your options.
- Before going on to the second coat, it is important to ensure that the first coat has had sufficient time to dry completely.
- After the first coat of plaster has had enough time to cure, you may begin applying the second and final coat.
- The purpose of the last coat you apply is to achieve a smooth finish by evening out all of the minute variances in the plaster you have used.
- The technique of applying pressure with a steel trowel to the surface of your plaster in order to burnish it is known as "burnishing."
- Soapstone is a form of natural plaster sealer that may be used to offer a foundation level of protection to your plaster.
- This is a terrific technique to protect your plaster.
- This causes a reaction with the plaster, which results in the production of a natural sealant.
- A substance known as cera wax is an option to consider if you want your Venetian plasters, such as Grassello Fino, to have a lustrous appearance.
- However, cera wax may be used for any Venetian plaster product.
FAQs About Venetian Plaster
TECHNIQUE: Savvy DIYers can apply homemade and synthetic Venetian plaster treatments themselves—but beware that application requires superior painting abilities. Homeowners should also have experience using a trowel and hawk before taking on DIY installation.
What differentiates Venetian plaster or lime plaster from other plasters is that no aggregates are mixed in. Tadelakt and Marmorino, for example, include aggregates like marble, granite, or glass
Venetian plaster is an excellent replacement for marble if the price or design restrictions prevent the use of true marble. Because of its natural properties and how it's applied (in thin, transparent layers that are often polished), it has a soft, earthy look with an iridescent finish, similar to marble or stone.
Venetian plaster, a beautiful and durable texture mimicking natural stone, dates back to fourth-century Rome. Creating it is a skill that takes years to master; however, there's room for artistic license. Modern tools and materials put the technique within the grasp of a DIYer.
Always remember: start by adding the plaster to the water, never the other way around! Why? Well how much plaster you will mix is always dependent how much water you start with. Usually, around half a bag of plaster is the most you can apply before the plaster sets if you're new to the mixing game.